Table of Contents
How to Make Chocolate Eggs at Home: Easy Recipe Guide
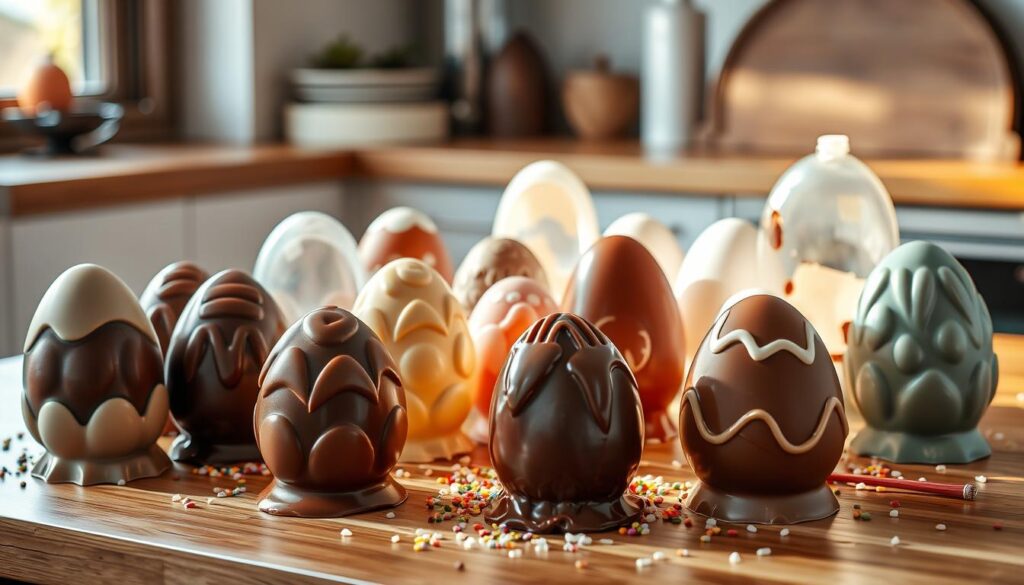
As the sun peeked through the window, filling the room with a warm glow, I couldn’t help but feel a surge of excitement. Easter, the season of renewal and joy, was just around the corner. And what better way to celebrate this cherished holiday than by crafting delectable homemade chocolate eggs? In this comprehensive guide, I’ll share with you the secrets to creating mouthwatering chocolate eggs that will delight your family and friends.
These treats aren’t just for Easter—they can also make a delicious addition to your breakfast table. Imagine pairing a cup of coffee or tea with a small, sweet chocolate egg to start your day on a festive note!

Key Takeaways
- Discover a foolproof recipe for making chocolate eggs at home
- Explore a variety of flavoring and filling options to customize your creations
- Learn the art of chocolate tempering to achieve a professional-looking finish
- Uncover tips and tricks to ensure your homemade chocolate eggs turn out perfectly
- Get insights on storage and shelf life to enjoy your delightful treats for longer
Introduction to Homemade Chocolate Eggs
Homemade chocolate eggs are a delightful treat that can be customized with various flavors and fillings. These Easter treats are a popular choice, with nearly 80 million chocolate eggs sold annually in the UK alone. Making chocolate eggs at home involves melting chocolate, molding it into egg shapes, and adding optional fillings like peanut butter, coconut, or candy.
Chocolate eggs have a rich history. The first commercially produced chocolate Easter eggs were introduced by Cadbury in 1875. These initial eggs were filled with sugared almonds coated in dark chocolate, setting the stage for the diverse range of chocolate eggs we enjoy today.
Chocolate eggs have become an integral part of Easter celebrations. Belgian chocolatiers are known for crafting exquisite Easter eggs using premium ingredients and traditional techniques. In the United States, chocolate eggs are often filled with treats like caramel, nougat, or peanut butter, catering to diverse palates and preferences.
As the demand for chocolate eggs continues to grow, companies have innovated by offering a wide array of Easter egg varieties. From miniature eggs to giant hollow eggs, and incorporating surprises like toys or puzzles within the eggs to add excitement for consumers.
| Statistic | Value |
|---|---|
| Annual Easter Egg Sales in the UK | 80 million |
| Year Cadbury Introduced First Commercial Chocolate Easter Eggs | 1875 |
| Cadbury Milk Chocolate Introduced | Early 1900s |
| Increase in Egg Variety with Cadbury Bars | 1970s and 1980s |
| Recipes for Chocolate Covered Peanut Butter Eggs | 5 from 2 votes |
| Prep Time for Chocolate Covered Peanut Butter Eggs | 1 hour and 20 minutes |
| Servings Yielded by Chocolate Covered Peanut Butter Eggs | 29 |
| Total Time for Chocolate Covered Peanut Butter Eggs | 2 hours and 50 minutes |
Whether you’re a fan of classic milk chocolate or prefer the rich intensity of dark cocoa, homemade chocolate eggs offer a delightful way to celebrate the Easter season. From traditional fillings to innovative flavor combinations, the possibilities for creating your own unique chocolate eggs are endless.

Essential Ingredients and Equipment
Making delicious chocolate eggs at home needs a few key tools and ingredients. Let’s look at the must-have equipment and chocolate types for your homemade treats.
Required Tools and Molds
Getting the right mold is crucial for perfect chocolate egg shapes. Choose egg-shaped plastic or silicone molds in various sizes. You’ll also need a double boiler for melting chocolate, a pastry brush for coating molds, and a food-safe paintbrush for decorations.
Types of Chocolate to Use
There are many chocolate options. Milk chocolate gives a creamy, classic taste. Dark cocoa candy melts offer a deeper flavor. Colored candy melts, like white, pink, or gold, add a fun color to your eggs. Try different chocolates to find your favorite.
Additional Ingredients
Adding extra ingredients can make your chocolate eggs even better. Confectioners’ sugar, cream cheese, butter, and vanilla extract can make rich fillings. You can also try unique fillings like peanut butter or coconut.

Understanding Chocolate Tempering Process
Tempering chocolate is key to making treats look professional and taste great. It involves heating and cooling the chocolate to align the cocoa butter crystals. This makes the chocolate shiny, smooth, and perfect for snapping.
By tempering chocolate, you avoid chocolate bloom. This is a grayish haze that happens when chocolate isn’t tempered right.
To temper chocolate, heat it to about 113°F (46°C) and then cool it to 86°F (30°C). This temperature change creates the right structure in the chocolate. It gives it a glossy look and a nice snap when you bite into it.
Tempering is important for many chocolate projects. It’s needed for molded chocolates, decorations, and candy making. Without tempering, chocolate can be cakey, blotchy, and stick to molds. Tempering ensures your chocolate looks and tastes great.
| Chocolate Type | Tempering Temperature |
|---|---|
| Dark Chocolate | 86°F (30°C) |
| Milk and White Chocolate | 81°F (27°C) |
Tempering chocolate needs careful temperature control. Use a good thermometer and follow the right guidelines for your chocolate. With practice, you’ll get the hang of chocolate tempering and make amazing chocolate treats at home.
Step-by-Step Guide to Making Chocolate Eggs
Making homemade chocolate eggs is a fun way to celebrate Easter. You can make professional-looking eggs in your kitchen with a few easy steps. Let’s explore how to make the perfect chocolate egg recipe and molding chocolate like a pro.
Preparing the Chocolate
To start, melt the chocolate carefully. You can use a double boiler or the microwave. Make sure not to overheat it. Use a mix of dark, milk, and white chocolate for the best taste.
Once melted, stir the chocolate often. This keeps it smooth and even.
Molding Technique
Now, it’s time to mold the chocolate. Pour the melted chocolate into molds, layer by layer. Chill the molds for 10 minutes between each layer. This helps the chocolate set well.
For hollow eggs, aim for 3-4 layers. This gives the eggs the right thickness.
After the last layer sets, take the eggs out of the molds. Trim the edges for a clean look. Use melted chocolate to stick the egg halves together. Learn More.
Setting and Cooling
Once the eggs are assembled, let them set and cool. Put them in the fridge for 30 minutes to an hour. This makes sure the chocolate shells stay firm.
By following these steps, you can make beautiful, tasty chocolate eggs. Enjoy making your own special Easter treats with this guide.
Flavoring and Filling Options
Make your homemade chocolate eggs even better with flavored chocolate and chocolate egg fillings. Get creative and enjoy these tasty options:
Buttercream Fillings
Creamy buttercream is a great choice for your chocolate eggs. Try vanilla, funfetti, coconut, or peanut butter fillings. They’re perfect for making balls or Easter eggs.
To make buttercream, mix cream cheese, butter, and powdered sugar. Add maple, cherry, or peppermint extracts for different flavors. Mix in nuts, coconut, or espresso beans for extra texture and taste.
Chocolate-Filled Eggs
Fill your chocolate eggs with small chocolates or candies for a special treat. Wrap mini milk chocolate eggs, jelly beans, or other sweets in your chocolate shells.
Make sure to seal the egg halves well to avoid leaks. Dip the egg in melted chocolate for a shiny finish. Decorate with sprinkles or toppings while the chocolate is wet.
Discover the fun of flavored chocolate and chocolate egg fillings to make a unique treat. With a bit of creativity, you can make impressive chocolate eggs that everyone will love.
Decorating Your Homemade Chocolate Eggs
Make your homemade chocolate eggs pop with vibrant decorations. Use colored candy melts to add color and pattern. Before adding the main chocolate layer, brush the molds with yellow, blue, or pink candy melts. This creates a striking visual effect.
Brushstroke Techniques
To get the brushstroke effect, melt the colored candy melts and apply them with a small paintbrush inside the molds. Let them set before adding the main chocolate layer. Try bold strokes, delicate lines, or swirling designs for a unique look.
Color and Pattern Ideas
- Pastel Hues: Soft shades of pink, blue, or yellow create a beautiful, feminine aesthetic.
- Vibrant Tones: Bright, saturated colors like neon pink or electric blue add a modern, eye-catching touch.
- Ombre Effects: Blend multiple colors together for a gradient effect that transitions seamlessly.
- Geometric Patterns: Clean lines and bold shapes, such as triangles or rectangles, offer a sleek, contemporary design.
- Organic Swirls: Flowing, naturalistic brushstrokes evoke a more whimsical, handcrafted vibe.
Be creative and try different chocolate egg decorations and colored candy melts to find your style. The possibilities are endless for making unique and stunning homemade chocolate eggs.
Storage and Shelf Life
Keeping your homemade chocolate eggs fresh is key. Store them in a cool, dry spot. This prevents melting and chocolate bloom.
Homemade chocolate eggs can last up to a week if stored right. Here’s how to keep them fresh:
- Put them in an airtight container or resealable bag.
- Keep them away from sunlight and heat.
- Don’t refrigerate them to avoid texture and flavor changes.
Remember, the shelf life can change based on the chocolate type and storage. Enjoy them within a week for the best taste.
Follow these tips to keep your chocolate eggs perfect. They’ll stay delicious and look great for days. Enjoy your tasty creations!
Troubleshooting Common Issues
Making homemade chocolate eggs can be fun, but it comes with its own set of problems. If you run into any issues, don’t worry. We’ve got solutions to help your chocolate eggs come out perfect every time.
Preventing Chocolate Bloom
Chocolate bloom is a white film that can ruin your chocolate. To avoid it, tempering your chocolate is key. Heat it to the right temperature and cool it slowly. This will keep your chocolate shiny and prevent bloom.
Fixing Uneven Shells
Uneven chocolate egg shells can be a problem. To fix them, just add more tempered chocolate to thin spots. If the chocolate is too thick, add a little shortening or oil to thin it out.
| Issue | Cause | Solution |
|---|---|---|
| Chocolate Bloom | Improper tempering | Ensure proper tempering by heating and cooling the chocolate to the right temperatures |
| Uneven Shells | Thin areas or air pockets | Apply an additional layer of tempered chocolate to thinner sections; thin out thick chocolate with a teaspoon of shortening or oil |
By tackling these common chocolate troubleshooting and chocolate egg problems, you’ll soon be making professional-looking chocolate eggs. With a bit of practice and focus, you’ll get the hang of making perfect chocolate eggs in no time.
Tips for Professional-Looking Results
Take your homemade chocolate eggs to the next level with a few easy tips. Wear rubber gloves to avoid fingerprints. Use a sharp knife for clean edges on your chocolate shells.
For a smooth finish, gently scrape the seams where the egg halves meet. This makes your chocolate eggs look professional.
When decorating, handle your eggs carefully to keep them looking perfect. Avoid touching them too much to prevent smudges or scratches. With a little care and precision, your chocolate eggs will impress everyone.
By using these chocolate egg techniques and focusing on presentation, you’ll get professional-looking results. Your loved ones will love your creations, and you’ll enjoy making them. Your chocolate eggs will be both beautiful and tasty.

